在搭建个人博客或技术文档网站时,如何让搜索引擎快速发现和收录新内容是一个重要问题。本文将详细介绍如何在 Docusaurus 中集成 IndexNow,实现内容的快速收录。
1. IndexNow 简介
1.1 什么是 IndexNow
IndexNow ��是一个开放协议,允许网站所有者即时通知搜索引擎其内容的变更。它由微软和 Yandex 共同开发,目前已得到多家搜索引擎的支持。
支持的搜索引擎
目前支持 IndexNow 的搜索引擎包括:
- Bing
- Yandex
- Seznam.cz
- Naver
- DuckDuckGo(通过 Bing)
1.2 为什么需要 IndexNow
传统的网站收录方式主要依赖:
- 搜索引擎定期爬取
- 提交 Sitemap
- 手动提交 URL
这些方式都存在一定的延迟。而 IndexNow 提供了一种主动推送的方式,可以:
- 实时通知搜索引擎内容更新
- 减少搜索引擎资源浪费
- 加快内容收录速度
2. 集成准备
2.1 获取 API Key
- 访问 IndexNow 官网
- 生成一个唯一的 API Key(32位字符串)
- 在网站根目录验证 Key 文件
2.2 项目配置
在 Docusaurus 配置文件中添加 IndexNow 相关配置:
// docusaurus.config.ts
export default {
  // ... 其他配置
  customFields: {
    indexNow: {
      key: '57cbafe50d9f4792b8056c635a805aa0'
    }
  }
}
3. 实现步骤
3.1 创建 IndexNow 工具
首先创建一个处理 IndexNow API 请求的工具文件:
// src/plugin/plugin-content-blog/IndexNow.js
const axios = require('axios');

async function submitToIndexNow(urlList, { host, key }) {
  try {
    const response = await axios.post('https://api.indexnow.org/indexnow', {
      host,
      key,
      keyLocation: `https://${host}/${key}.txt`,
      urlList: urlList
    }, {
      headers: {
        'Content-Type': 'application/json; charset=utf-8'
      }
    });

    console.log('IndexNow submission successful:', response.data);
    return response.data;
  } catch (error) {
    console.error('Error submitting to IndexNow:', error);
    throw error;
  }
}

module.exports = {
  submitToIndexNow
};
3.2 修改博客插件
在博客插件中集成 IndexNow 提交功能:
// src/plugin/plugin-content-blog/index.js
const { submitToIndexNow } = require('./IndexNow');

async function blogPluginEnhanced(context, options) {
  const blogPluginInstance = await blogPlugin(context, options)
  const { siteConfig } = context;
  const siteUrl = siteConfig.url;
  const indexNowConfig = siteConfig.customFields?.indexNow || {};
  const host = new URL(siteUrl).hostname;

  return {
    // ... 其他配置
    async contentLoaded({ content, actions }) {
      // 收集所有博客文章的 URL
      const urlList = content.blogPosts.map(post => {
        const path = post.metadata.permalink;
        if (!path) {
          console.warn('Post permalink is undefined:', post.id);
          return null;
        }
        return `${siteUrl}${path}`;
      }).filter(Boolean);

      // 提交到 IndexNow
      if (urlList.length > 0 && indexNowConfig.key) {
        try {
          await submitToIndexNow(urlList, {
            host,
            key: indexNowConfig.key
          });
          console.log('Successfully submitted URLs to IndexNow');
        } catch (error) {
          console.error('Failed to submit URLs to IndexNow:', error);
        }
      }
    }
  };
}
3.3 添加验证文件
在 static 目录下创建验证文件:
// static/57cbafe50d9f4792b8056c635a805aa0.txt
57cbafe50d9f4792b8056c635a805aa0
4. 工作原理
4.1 提交流程
- 网站构建时,插件收集所有博客文章的 URL
- 从配置中获取网站域名和 IndexNow key
- 调用 IndexNow API 提交 URL 列表
- 搜索引擎接收到通知后会尽快爬取新内容
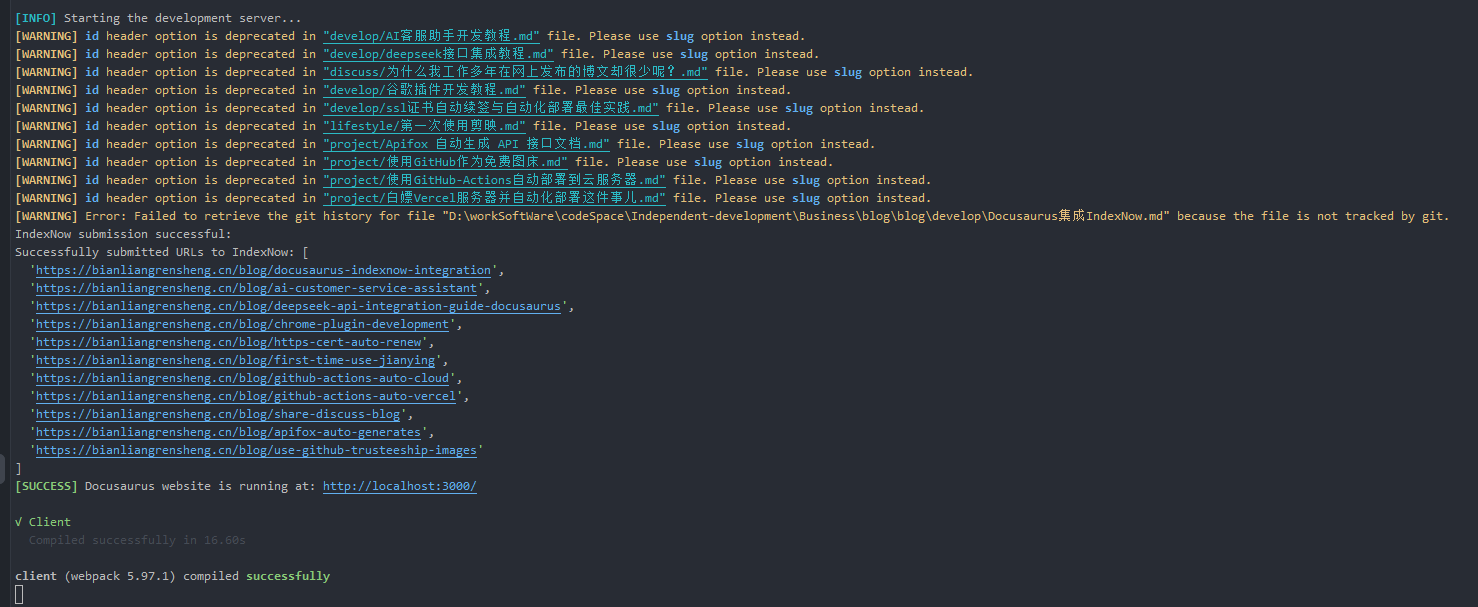
提交成功后,你会看到类似下面的响应:
4.2 验证机制
- 搜索引擎收到提交请求后,会先验证 key 文件
- 验证通过后才会�处理提交的 URL 列表
- 如果验证失败,提交请求会被拒绝
注意事项
- key 文件必须能通过 HTTPS 访问
- 提交的 URL 必须属于验证的域名
- 每个 URL 每天最多提交 10 次
5. 最佳实践
5.1 优化建议
-
选择性提交:
- 只提交新增或更新的文章
- 避免重复提交相同的 URL
-
错误处理:
- 添加适当的错误处理机制
- 记录提交失败的 URL 以便重试
-
监控反馈:
- 记录提交状态和响应
- 定期检查收录情况
5.2 配置示例
完整的配置示例:
// docusaurus.config.ts
export default {
  title: '网站标题',
  url: 'https://example.com',
  customFields: {
    indexNow: {
      key: 'your-indexnow-key',
      // 可以添加其他配置项
      submitOnBuild: true,
      logLevel: 'info'
    }
  }
};
6. 常见问题
Q1: 提交失败怎么办?
A1: 检查以下几点:
- key 文件是否正确部署
- 域名是否配置正确
- URL 格式是否符合要求
Q2: 如何验证提交是否成功?
A2: 可以通过以下方式验证:
- 检查控制台日志
- 使用 Bing Webmaster Tools
- 观察搜索引擎收录情况